
Optimizing Images For Search Engines: The Role Of Image Sitemaps
In this article, we will discuss the importance and benefits of using an image sitemap for SEO.
We will cover topics such as how to create and submit an image sitemap to Google, the types of image file formats supported, and how to ensure that your images are properly indexed by search engines.
Additionally, we will discuss the maximum number of images and sitemap file size limit, as well as how to verify that your image sitemap is working correctly.
Images are a vital part of any website and can greatly enhance the user experience. However, if search engines are unable to properly index your images, they may not appear in image search results, resulting in lost traffic and potential customers.
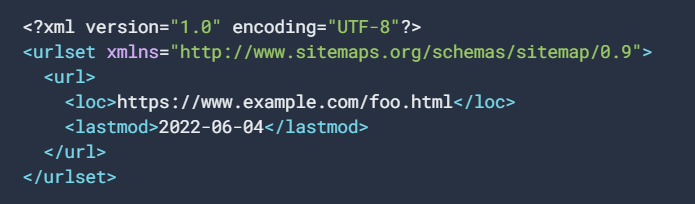
An image sitemap is an XML file that provides information about the images on your website to search engines, helping them to more effectively crawl and index your images.
In this article, we will explore the importance and benefits of using an image sitemap for SEO, and provide a step-by-step guide on how to create and submit one to Google.
What Is An Image Sitemap And Why Is It Important For SEO?
An image sitemap is an XML file that provides information about the images on your website to search engines, helping them to more effectively crawl and index your images.
It is an important tool for optimizing images for search engines, and can greatly enhance the visibility of your website in image search results.
Images are a vital part of any website and can greatly enhance the user experience. However, if search engines are unable to properly index your images, they may not appear in image search results, resulting in lost traffic and potential customers. An image sitemap can help to ensure that your images are properly indexed by providing search engines with information about the images on your website, such as the image file location, title, and caption.
Image sitemaps also provide search engines with information about the images on your website, such as the image file location, title, and caption. This allows search engines to more effectively crawl and index your images, resulting in better visibility and ranking in image search results.
Creating an image sitemap is relatively simple, and can be done using a variety of tools or manually. Once created, it should be submitted to Google through your Google Search Console account. Google will then use the information in your image sitemap to help crawl and index your images. It is important to regularly update your image sitemap as you add new images to your website.
In addition to providing search engines with information about your images, an image sitemap can also help to improve the user experience. By providing captions and titles for your images, you can help users understand the content of the image and make it more accessible for users with visual impairments.
An image sitemap can also help to improve the loading time of your website. By providing search engines with information about the size and resolution of your images, you can help them to optimize the loading time of your images, resulting in a faster and more user-friendly experience.
In conclusion, an image sitemap is an important tool for optimizing images for search engines. It can help to ensure that your images are properly indexed, resulting in better visibility and ranking in image search results. Additionally, it can help to improve the user experience and loading time of your website. It is a simple and effective way to optimize images for search engines, and is a must-have for any website that uses images. Regularly updating your image sitemap and submitting it to Google will help your website to be properly indexed and increase the visibility of your images in image search results.
How Can I Create An Image Sitemap For My Website?
An image sitemap is a specific type of XML sitemap that helps search engines understand the images on your website. Creating an image sitemap can help improve the visibility of your website's images in search engine results pages (SERPs), making it more likely that people will find and click on them.
Here is a step-by-step guide on how to create an image sitemap for your website:
- Gather image information: Before you can create an image sitemap, you need to gather information about the images on your website. This includes the image file name, the URL of the page where the image is located, and the URL of the image itself. You should also include information about the image's caption and title, as well as any other relevant information.
- Create a sitemap: To create an image sitemap, you'll need to use a tool that can generate XML sitemaps. There are many free and paid sitemap generators available online, and many content management systems (CMSs) also have built-in sitemap generators. Once you've chosen a tool, you'll need to input the information you gathered in step 1 into the tool's form fields.
- Submit the sitemap to search engines: Once you've created your image sitemap, you'll need to submit it to the major search engines. You can do this by adding the sitemap's URL to your website's robots.txt file and then submitting it to the search engines through their respective webmaster tools.
- Regularly update the sitemap: As you add new images to your website, you'll need to update your image sitemap accordingly. Make sure to regularly check your sitemap for errors and update it as needed.
- Optimize your images: Optimizing your images can help improve their visibility in search engine results pages. This includes compressing images to reduce their file size, using descriptive file names and alt tags, and making sure the images are relevant to the content of the page they are on.
Creating an image sitemap can be a bit of work, but it's worth the effort if you want to improve the visibility of your website's images in search engine results pages.
By following the steps outlined above, you'll be able to create an image sitemap that will help search engines understand the images on your website, making it more likely that people will find and click on them.
What Types Of Image File Formats Are Supported In Image Sitemaps?
When creating an image sitemap for your website, it is important to understand the types of image file formats that are supported.
An image sitemap is an XML file that provides information about the images on your website to search engines, helping them to more effectively crawl and index your images.
By including information about your images in a sitemap, search engines can better understand the context and relevance of the images on your site, which can lead to improved visibility in image search results.
There are several image file formats that are commonly supported in image sitemaps, including JPEG, PNG, GIF, and BMP. JPEG, or Joint Photographic Experts Group, is a commonly used image file format for photographs and other high-resolution images. It is a lossy format, meaning that some image data is lost during compression, but it results in smaller file sizes. PNG, or Portable Network Graphics, is a lossless format that is often used for images that require transparency, such as logos or graphics. GIF, or Graphics Interchange Format, is also a lossless format that supports animation and is commonly used for short animations and simple graphics. BMP, or Windows Bitmap, is a lossless format that is primarily used on Windows operating systems.
It is important to note that while these formats are commonly supported in image sitemaps, it is always best to check the guidelines of the specific search engine you are submitting your sitemap to, as they may have their own specific requirements. For example, Google's guideline states that they support images in JPEG, PNG, GIF (including animated GIFs) and BMP formats.
In addition to the file format, it is also important to consider the size and resolution of the images in your image sitemap. Large images can slow down the loading time of your website, which can negatively impact user experience and search engine rankings. It is recommended to use images that are optimized for web use and are not larger than necessary.
When submitting your image sitemap to a search engine, it is also important to include information about the images such as the image file name, the URL of the page where the image is located, and the date the image was last modified. This information can help search engines better understand the context and relevance of the images on your site.
In conclusion, understanding the types of image file formats that are supported in image sitemaps is an important step in creating a sitemap that effectively communicates the information about your images to search engines. Commonly supported formats include JPEG, PNG, GIF, and BMP, but it is always best to check the guidelines of the specific search engine you are submitting your sitemap to. Along with file format, it is also important to consider the size and resolution of the images and to include relevant information about the images in your sitemap. By following these guidelines, you can improve the visibility of your images in image search results and drive more traffic to your website.
How Do I Submit My Image Sitemap To Google?
Submitting an image sitemap to Google is an important step in ensuring that your website's images are properly indexed and appearing in Google Image search results.
A sitemap is a file that contains a list of all the URLs on your website, and an image sitemap specifically lists all the images on your website. By submitting an image sitemap, you are providing Google with a comprehensive list of all the images on your website, making it easier for Google to crawl and index them.
The first step in submitting an image sitemap to Google is to create the sitemap. There are a few different ways to create an image sitemap, but the most common method is to use a sitemap generator tool. These tools are available online and are typically free to use. They will take your website's URLs and create an image sitemap in the proper format for you.
Once you have created your image sitemap, you will need to upload it to your website. The sitemap should be placed in the root directory of your website, so it is easily accessible to Google. It's also important to make sure that your sitemap is accessible to the public, so that Google can find it.
After uploading the image sitemap to your website, you will need to submit it to Google. To do this, you will need to have a Google Search Console account. If you don't already have one, you can sign up for free at search.google.com/search-console.
Once you have a Google Search Console account, you can submit your image sitemap by following these steps:
- Log in to your Google Search Console account.
- Click on the website that you want to submit the image sitemap for.
- Click on the "Sitemaps" option in the left sidebar.
- Click on the "Add/Test Sitemap" button.
- Enter the URL of your image sitemap and click "Submit."
After submitting your image sitemap, Google will begin to crawl and index the images on your website. It may take some time for all of your images to appear in Google Image search results, but by submitting an image sitemap, you are making it easier for Google to find and index your images.
One important thing to note is that an image sitemap should be updated regularly. As you add new images to your website, you will need to update your image sitemap and re-submit it to Google. This will ensure that all of your images are being indexed and appearing in Google Image search results.
In conclusion, submitting an image sitemap to Google is an important step in making sure that your website's images are properly indexed and appearing in Google Image search results. By creating an image sitemap, uploading it to your website, and submitting it to Google, you are making it easier for Google to crawl and index your images. Remember to update your image sitemap regularly and re-submit it to Google to ensure that all of your images are being indexed.
What Are The Benefits Of Using An Image Sitemap?
Using an image sitemap can greatly enhance the visibility of your images in search engines, leading to increased traffic and potential customers.
Here are some of the key benefits of using an image sitemap:
- Improved Image Indexing: An image sitemap provides information about the images on your website to search engines, helping them to more effectively crawl and index your images. This can lead to your images appearing in image search results, driving more traffic to your website.
- Increased Visibility: By including information such as the title, caption, and usage of each image in your image sitemap, you can make it easier for search engines to understand the context and relevance of your images. This can lead to increased visibility of your images in search results, driving more traffic to your website.
- Better User Experience: By including information about the different image sizes and resolutions in your image sitemap, you can make it easier for search engines to serve the appropriate images to users based on their device and screen size. This can lead to a better user experience, as users will be served images that are optimized for their device.
- Ability to Track Image Performance: By submitting your image sitemap to Google, you can use Google Search Console to track the performance of your images in search results. This can give you valuable insight into which images are performing well and which ones need to be optimized further.
- Ability to Submit new images: An image sitemap allows you to inform Google about new images on your website, which helps to get them indexed quickly.
- Better Understanding of Image Structure: An image sitemap provides a way to better understand the structure of your images, which can help to improve the overall usability and accessibility of your website.
- Helps to Improve Local SEO: By including location information in your image sitemap, you can help search engines understand the location of your business and images, which can improve your local search results.
- Helps to Improve Mobile SEO: By including information about the different image sizes and resolutions in your image sitemap, you can make it easier for search engines to serve the appropriate images to users based on their device and screen size. This can lead to a better user experience, as users will be served images that are optimized for their device, thus improving mobile SEO.
In conclusion, an image sitemap can greatly enhance the visibility of your images in search engines, leading to increased traffic and potential customers. With improved image indexing, increased visibility, better user experience, ability to track image performance and better understanding of image structure, using an image sitemap can be an essential tool for optimizing your images for search engines.
How Frequently Should I Update My Image Sitemap?
An image sitemap is an important tool for website owners to ensure that their images are properly indexed by search engines. It is a separate file that lists all of the images on a website, along with information about each image such as its location, title, and caption.
This file is then submitted to search engines, allowing them to more easily find and index the images on the website.
So, how frequently should you update your image sitemap? The answer to this question depends on how often you update your website. If you are frequently adding new images to your website, then it is important to update your image sitemap on a regular basis. This will ensure that search engines are able to find and index the new images as soon as possible.
If you are not adding new images to your website on a regular basis, then you may not need to update your image sitemap as frequently. However, it is still important to periodically check your image sitemap and make sure that it is up-to-date. This will ensure that search engines are able to find and index all of the images on your website, even if they are not new.
One important thing to keep in mind when updating your image sitemap is that you should always check for broken links. If an image that is listed in your image sitemap no longer exists on your website, then it will not be indexed by search engines. This can have a negative impact on your search engine rankings, so it is important to remove any broken links from your image sitemap as soon as you discover them.
Another thing to consider when updating your image sitemap is the use of alt tags. Alt tags are used to provide a brief description of an image, and they are important for both search engines and visually impaired users. Make sure that all of the images on your website have alt tags, and that they are relevant and descriptive.
In summary, the frequency of updating your image sitemap will depend on how often you update your website. If you are adding new images on a regular basis, then it is important to update your image sitemap on a regular basis. If you are not adding new images, then you may not need to update your image sitemap as frequently. However, it is still important to periodically check your image sitemap and make sure that it is up-to-date. Always check for broken links and use relevant and descriptive alt tags for all images on your website. This will ensure that search engines are able to find and index all of the images on your website and improve your search engine rankings.
How Do I Ensure That My Images Are Properly Indexed By Search Engines?
Ensuring that your images are properly indexed by search engines is crucial for maximizing their visibility and driving traffic to your website.
One way to do this is by using an image sitemap, which is an XML file that provides information about the images on your website to search engines.
When creating an image sitemap, it's important to provide detailed information about each image, such as the image file's location, caption, and title. You should also include information about the image's size and resolution, as well as any licensing information. Additionally, it's important to ensure that your images are properly tagged with alt text, which is used by search engines to understand the content of an image.
Another way to ensure that your images are properly indexed is by optimizing them for search engines. This includes using descriptive, relevant file names and alt text, as well as compressing images to reduce their file size without sacrificing quality. You should also make sure that your images are properly sized and scaled for the web.
It's also important to note that images that are embedded in flash or javascript may not be indexed by search engines. Therefore, if you have images on your website that are embedded in these technologies, you should consider providing alternative text or image descriptions to make them more search engine friendly.
Additionally, you should make sure that your images are properly linked to from your website. This means that they should be accessible from a text link and not just through a script or javascript. If images are not linked from your website, it makes it difficult for search engines to find them and index them.
Finally, you should regularly check your website's image search performance by using Google Search Console or other webmaster tools. This will allow you to identify any issues with image indexing and make any necessary changes to improve your images' visibility in search results.
In conclusion, using an image sitemap is a great way to ensure that your images are properly indexed by search engines. Additionally, optimizing your images for search engines, properly linking them to your website, and regularly checking their performance are all key steps in maximizing their visibility and driving traffic to your website. It's important to invest time and effort in image optimization to make sure your images are properly indexed and that they can help your website to rank better on the search engine.
How Do I Indicate The Different Image Sizes And Resolutions In My Image Sitemap?
An image sitemap is a file that lists all the images on a website and provides information about them to search engines. This information can include the image's location, caption, and size.
Indicating the different image sizes and resolutions in an image sitemap is important for several reasons.
First, it helps search engines understand the images on your website. Search engines use image sitemaps to index images and make them more discoverable in search results. By providing information about the image's size and resolution, search engines can better understand the image's relevance and context.
Second, indicating different image sizes and resolutions in an image sitemap can improve the user experience. When a user accesses a website on a mobile device, the website may automatically adjust the size of the images to fit the smaller screen. By providing information about the image's size and resolution, the website can ensure that the images look good on all devices.
Third, indicating different image sizes and resolutions in an image sitemap can improve website performance. Large images can slow down a website's loading time, especially on mobile devices. By providing information about the image's size and resolution, the website can ensure that the images are optimized for different devices and network speeds.
To indicate the different image sizes and resolutions in an image sitemap, you will need to use the "image:image" and "image:resolution" tags. The "image:image" tag is used to specify the location of the image, and the "image:resolution" tag is used to specify the image's size and resolution.
For example, let's say you have an image called "image1.jpg" that is located in the "images" folder on your website. To indicate the different image sizes and resolutions in your image sitemap, you would use the following code:
<image:image>
<image:loc>example.com/images/image1.jpg</image:loc>
<image:resolution>800x600</image:resolution>
</image:image>
This code tells search engines that the image is located at "http://www.example.com/images/image1.jpg" and has a resolution of 800x600 pixels.
You can also use the "image:res" tag to specify the image's resolution in DPI (dots per inch). For example, you might use the following code to specify that the image has a resolution of 72 DPI:
<image:image>
<image:loc>http://www.example.com/images/image1.jpg</image:loc>
<image:res>72</image:res>
</image:image>
It's also a good idea to include multiple sizes of the same image in your image sitemap. This way, search engines can choose the best size for a particular device or network speed.
For example, you might use the following code to include three different sizes of the same image in your image sitemap:
<image:image>
<image:loc>example.com/images/image1.jpg</image:loc>
<image:resolution>800x600</image:resolution>
</image:image>
<image:image>
<image:loc>example.com/images/image1_medium.jpg</image:loc>
<image:resolution>600x450</image:resolution>
</image:image>
<image:image>
<image:loc>example.com/images/image1_small.jpg</image:loc>
<image:resolution>400x300</image:resolution>
</image:image>
This way, search engines can choose the best size of the image for the user's device and network speed, improving the user experience and website performance.
It's also important to note that the "image:image" and "image:resolution" tags should be placed within the "url" tag, which specifies the webpage where the image is located. The "image:caption" tag can also be used to provide a caption or description of the image, which can help search engines understand the image's context and relevance.
In addition, it is important to ensure that your images are properly labeled with alternative text (alt text) and titles, which provide a text description of the image for screen readers and search engines. This can greatly improve the accessibility of your website for users with visual impairments.
In conclusion, indicating different image sizes and resolutions in an image sitemap is important for several reasons. It helps search engines understand the images on your website, improves the user experience, and improves website performance. By using the "image:image" and "image:resolution" tags, and including multiple sizes of the same image, you can ensure that your images are properly indexed and optimized for all devices and network speeds. Remember to also include alt texts and titles in your images to improve the accessibility of your website.
What Are The Maximum Number Of Images And Sitemap File Size Limit?
When creating an image sitemap, it's important to be aware of the limitations in terms of the number of images and the file size.
These limitations are set by Google and other search engines to ensure that the image sitemaps are easily crawlable and manageable.
The maximum number of images that can be included in a single image sitemap is 50,000. This means that if you have more than 50,000 images on your website, you will need to create multiple image sitemaps or use the Google Search Console to submit them. It's important to note that the number of images in an image sitemap doesn't necessarily correspond to the number of images on your website. Some images may be excluded from the image sitemap if they are not relevant to the content of the page or if they are not of high quality.
The file size limit for an image sitemap is 1MB. This means that the total size of the image sitemap file, including all of the images and the XML code, must be less than 1MB. If your image sitemap file exceeds this limit, you will need to either reduce the number of images or resize them to decrease the file size.
It's important to keep in mind that these limits are set by the search engines and not by the webmaster. If you exceed these limits, the search engines may not crawl and index all of your images, which can negatively impact your visibility in image search results.
To ensure that your image sitemap is within these limits, you can use a tool such as the Google Search Console to validate the sitemap. This tool will show you any errors or warnings in your image sitemap, including if the file size is too large or if there are too many images. Additionally, you can use the sitemap validator tools, which will help you to check for any syntax errors, broken links and other issues.
It's also important to regularly update your image sitemap as you add or remove images from your website. This will help to ensure that the search engines have the most up-to-date information about your images, and can properly crawl and index them.
In conclusion, image sitemaps are an important tool for optimizing images for search engines, but it's important to be aware of the limitations in terms of the number of images and the file size. By staying within these limits and regularly updating your image sitemap, you can ensure that your images are properly indexed and visible in image search results.
How Do I Verify That My Image Sitemap Is Working Correctly?
Verifying that your image sitemap is working correctly is an important step in ensuring that your images are being properly indexed by search engines and that they are easily accessible to users.
There are a few different ways to verify that your image sitemap is working correctly, including using Google Search Console, checking for errors in your sitemap, and testing your images on different devices and browsers.
The first step in verifying that your image sitemap is working correctly is to check it using Google Search Console. This is a free tool provided by Google that allows you to monitor the performance of your website on the search engine. To use this tool, you will need to sign up for a free account and verify that you are the owner of the website. Once you have done this, you can access the Search Console and view the status of your image sitemap. You can see how many images have been indexed, how many have been blocked, and any errors that have been found. This will give you an overall picture of how your image sitemap is performing and whether any issues need to be addressed.
Another way to verify that your image sitemap is working correctly is to check for errors in your sitemap. This can be done by using a sitemap validator tool, such as the one provided by Google. This tool will check your sitemap for any errors or inconsistencies and will give you a report on any issues that have been found. It is important to fix any errors that are found as soon as possible, as they can prevent your images from being indexed properly.
Another way to verify that your image sitemap is working correctly is to test your images on different devices and browsers. This will help you to ensure that your images are being properly displayed on all devices and that they are easily accessible to users. You can do this by using a website testing tool, such as BrowserStack, which allows you to test your website on different devices and browsers. This will give you an idea of how your images are performing on different devices and whether any issues need to be addressed.
Lastly, you can test your images by searching for them on Google. Search for the images by their file names and check if the image is showing up on the first page of Google. If the images are not showing up, there may be an issue with the image sitemap or the images may not be properly indexed.
In conclusion, verifying that your image sitemap is working correctly is an important step in ensuring that your images are being properly indexed by search engines and that they are easily accessible to users. By using tools such as Google Search Console, checking for errors in your sitemap, and testing your images on different devices and browsers, you can ensure that your image sitemap is working correctly. Additionally, testing the images by searching for them on Google will give you an idea of how they are performing on the search engine. This will help you to identify any issues that need to be addressed, and will help you to ensure that your images are properly indexed and easily accessible to users.
Optimizing Image Sitemaps With Market Brew
Using Market Brew's SEO software when optimizing image sitemaps can greatly improve the visibility and ranking of your website on search engines.
Market Brew uses search engine models to analyze and understand what a search engine wants to see in an image sitemap, and then provides you with the necessary tools and information to optimize your image sitemap accordingly.
The first step in optimizing your image sitemap using Market Brew is to ensure that all of your images are properly tagged with relevant keywords.
This means that each image should have a unique, descriptive file name that includes the main keyword for that image. Additionally, the alt text for each image should also include the main keyword and provide a brief, accurate description of the image. This allows search engines to understand the context of the image and how it relates to your website's content.
Another important factor to consider when optimizing your image sitemap is to make sure that your images are properly compressed and optimized for web use. This means that the file size of your images should be as small as possible while still maintaining high quality. This can be achieved by using tools such as Adobe Photoshop or other image editing software to resize and compress your images. Market Brew's software can also help you identify images that are too large and need to be optimized.
In addition to optimizing the images themselves, it's also important to optimize the way they are presented on your website. This means that your images should be properly aligned and spaced, and should be used in conjunction with text to create a visually appealing and user-friendly layout.
Market Brew's software can also help you identify areas where your images are not properly aligned or spaced, and provide you with recommendations for how to improve the overall visual design of your website.
Another key aspect of optimizing your image sitemap is to make sure that your images are properly indexed by search engines. This means that your images should be included in your website's XML sitemap, and that the URLs for your images should be included in the <image:image> tags of your image sitemap.
Market Brew's software can also help you identify if there are any errors in your image sitemap and provide you with recommendations for how to fix them.
Finally, it's important to regularly update and maintain your image sitemap as your website evolves and new images are added. Market Brew's software can help you keep track of new images and ensure that they are properly tagged and indexed, and can also provide you with alerts if there are any issues with your image sitemap.

By following these tips and utilizing Market Brew's SEO software, you can greatly improve the visibility and ranking of your website on search engines.
With the right tools and techniques, you can ensure that your images are properly optimized and that your image sitemap is optimized for search engines.
This will help drive more traffic to your website and increase your online visibility.
Ready to Take Control of Your SEO?
See how Market Brew's predictive SEO models and expert team can unlock new opportunities for your site. Get tailored insights on how we can help your business rise above the competition.
Schedule a demonstration today via our Menu Button and Contact Form to discover how we engineer SEO success.
You May Also Like:
Guides & Videos
Market Brew: The Choice of Leading SEO Teams
News
Market Brew… Built To Go “AI Mode”!
Guides & Videos
White Hat Strategies For SEO
From ambiguity to actionable insight.
Decode ranking systems, surface leverage points, and deploy with clarity.